


Epoxy kits are revolutionizing the world of DIY projects and crafts. Whether you’re a seasoned professional or just starting on your creative journey, these versatile kits offer endless possibilities for innovation and artistry. With their incredible durability and ease of use, epoxy kits have become a favorite among hobbyists and home improvement enthusiasts alike.
Imagine transforming plain surfaces into stunning works of art or creating strong bonds that stand the test of time. From crafting unique jewelry pieces to restoring furniture, epoxy has found its way into countless applications. Its adaptability makes it an essential tool in any toolkit.
Are you ready to explore the exciting realm of epoxy kits? Let’s dive deeper into what makes them so special!
Different Types of Epoxy Kits
Epoxy kits come in various types, each designed to meet specific needs and applications. The most common are general-purpose epoxy kits, ideal for everyday repairs and projects around the house.
For those looking to tackle more demanding tasks, specialty epoxy kits offer enhanced features. These can include water-resistant formulas or high-temperature resistance, perfect for automotive repairs or outdoor furniture.
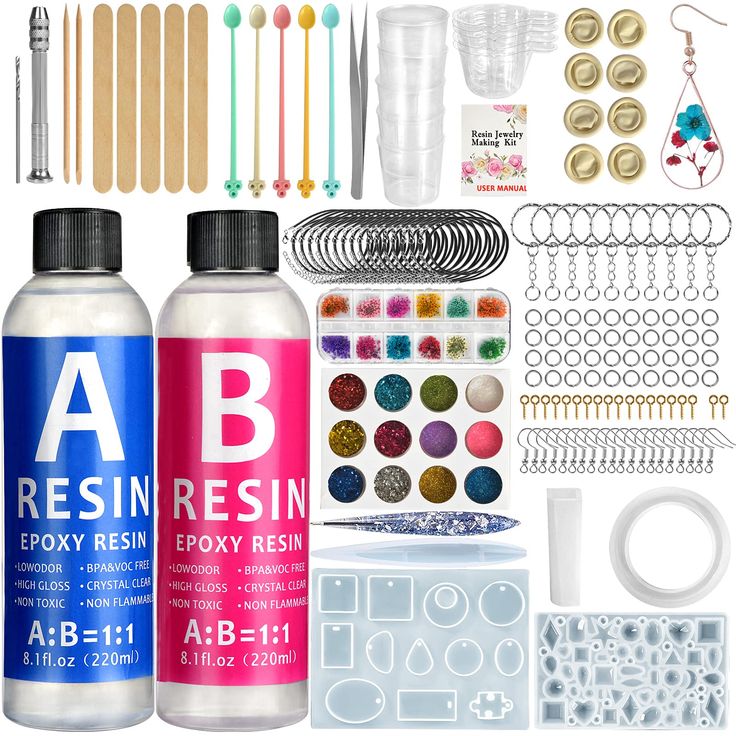
Craft enthusiasts might prefer art-grade epoxy kits. These often have vibrant colors and additives that allow for stunning finishes on resin art pieces like coasters or jewelry.
Another popular option is coating epoxies. They provide a strong layer over surfaces like countertops or floors, enhancing durability while adding an appealing sheen.
There are fast-setting epoxy kits that cure quickly—great when time is of the essence but quality cannot be compromised. Each type serves unique purposes while delivering impressive results.
Benefits of Using Epoxy Kits
epoxy kits offer remarkable durability. They create a strong bond that withstands wear and tear, making them ideal for various projects.
Another key benefit is their versatility. Whether you’re crafting jewelry, repairing furniture, or creating art pieces, epoxy adapts to your needs seamlessly.
Ease of use is another significant advantage. Many epoxy kits come with clear instructions and all necessary components. This means you can start your project quickly without a steep learning curve.
Additionally, the finish achieved with epoxy is stunning. It provides a glossy surface that enhances colors and patterns in your creations.
These kits are often resistant to chemicals and moisture. This makes them suitable for both indoor and outdoor applications, ensuring longevity in diverse environments.
Popular Uses for Epoxy Kits
Epoxy kits are incredibly versatile, making them a favorite among DIY enthusiasts and professionals alike. One of the most popular uses is in crafting stunning resin art. Artists love mixing colors and embedding objects to create unique pieces.
In home improvement, epoxy kits shine when it comes to flooring. They provide durable, waterproof surfaces that withstand heavy foot traffic while looking sleek and modern.
Furniture restoration is another area where these kits excel. From tabletops to bar tops, they can transform worn-out surfaces into glossy masterpieces.
Additionally, epoxy kits serve well in automotive applications. Whether sealing leaks or creating custom parts, their strong bond ensures longevity.
Even jewelry makers utilize epoxy for crafting beautiful pendants and earrings by encapsulating glitter or photographs for personal flair. The possibilities truly are endless with epoxy!
Step-by-Step Guide on How to Use an Epoxy Kit
Using an epoxy kit is straightforward and fun. Start by gathering all your materials. You’ll need the epoxy resin, hardener, mixing tools, gloves, and a clean workspace.
Next, prepare your surface. Ensure it’s free of dust or grease for optimal adhesion.
Once ready, measure equal parts of resin and hardener as specified in the instructions. Pour them into a mixing container.
Mix thoroughly for about three to five minutes until you achieve a uniform consistency without streaks.
After that, pour the mixture onto your prepared surface or mold slowly to prevent air bubbles from forming. Use a heat gun or torch lightly over the surface if needed to eliminate any bubbles that do appear.
Let it cure according to manufacturer guidelines—patience pays off!
Tips for Choosing the Right Epoxy Kit
When it comes to selecting the perfect epoxy kit for your project, consider a few essential factors. First, assess what you aim to achieve with the epoxy. Different kits serve different purposes—whether it’s crafting, repairs, or artistic endeavors.
Next, take note of the materials you’ll be working with. Some kits are specifically designed for wood, while others cater to metal or concrete surfaces. Understanding compatibility will help ensure optimal results.
Pay attention to curing time as well. If you’re looking for a quick turnaround on your project, choose an epoxy that sets faster. However, if you’re after more intricate work requiring precision and detail, consider one with a longer working time.
Budget is another factor worth considering; quality can vary significantly among brands and types of kits available in the market. Invest in reputable products but also keep an eye out for reviews from other users who have tackled similar projects.
Don’t forget about safety precautions! Always look at the manufacturer’s guidelines regarding ventilation and protective gear during application.
With these tips in mind, choosing the right epoxy kit becomes much more manageable—and opens up a world of creative possibilities waiting for you to explore.


